
m (→Transformation Talismans: monkey claw) |
No edit summary |
||
| (21 intermediate revisions by 3 users not shown) | |||
| Line 1: | Line 1: | ||
| − | [[File:Shantae_GBC_-_SS_-_02.gif|thumb|Shantae's inventory. |
+ | [[File:Shantae_GBC_-_SS_-_02.gif|thumb|Shantae's full inventory.]] |
Here is a list of items from [[Shantae (Game)|''Shantae'' for the GBC]].<ref name="faq1">http://www.gamefaqs.com/gbc/550864-shantae/faqs/19368 Shantae FAQ by Daniel (FecalLord) Engel</ref> |
Here is a list of items from [[Shantae (Game)|''Shantae'' for the GBC]].<ref name="faq1">http://www.gamefaqs.com/gbc/550864-shantae/faqs/19368 Shantae FAQ by Daniel (FecalLord) Engel</ref> |
||
| Line 110: | Line 110: | ||
| 20 |
| 20 |
||
| Faster/stronger than a pike ball. |
| Faster/stronger than a pike ball. |
||
| − | |- |
||
| − | | [[File:Boot.png]] |
||
| − | | Boot |
||
| − | | 300 |
||
| − | | Double-tap up for a 2 hit spin kick. |
||
| − | |- |
||
| − | | [[File:Sash.png]] |
||
| − | | Sash |
||
| − | | 400 |
||
| − | | Attack during a spin kick to drill through your foes. |
||
| − | |- |
||
| − | | [[File:Cuff.png]] |
||
| − | | Cuff |
||
| − | | 500 |
||
| − | | Hold down attack to charge up a mighty elbow dash. |
||
| − | |- |
||
| − | | [[File:Tiara.png]] |
||
| − | | Tiara |
||
| − | | 900 |
||
| − | | Attack during an elbow dash for a powerful twirl attack. |
||
|- |
|- |
||
| [[File:Key.png]] |
| [[File:Key.png]] |
||
| Line 137: | Line 117: | ||
|} |
|} |
||
| + | ===Fighter's Gear=== |
||
| − | ===[[File:Shantae_GBC_-_sprite_-_Heart_Holder.gif|32px]] Heart Holders=== |
||
| + | {{grab|Fighter's Gear}} |
||
| + | ===Heart Holders=== |
||
| − | {| class="sortable mergetable standardtable" border=0 cellpadding=0 cellspacing=0 |
||
| + | {{grab|Heart Holders (Shantae)}} |
||
| − | |- valign="top" style="border:1px solid #ccc;" |
||
| − | ! # |
||
| − | ! Location |
||
| − | ! Required |
||
| − | ! Description |
||
| − | | Img |
||
| − | |- |
||
| − | | 1 |
||
| − | | {{Shantae1place|Scarecrow Field}} |
||
| − | | {{Form|Monkey}} / Cuff + Tiara |
||
| − | | On a slab of rock held by two pillars. Have the monkey jump up there. |
||
| − | | [[File:Shantae_(USA)_45_HH1.png|60px]] |
||
| − | |- |
||
| − | | 2 |
||
| − | | {{Shantae1place|Naga Wasteland}} |
||
| − | | {{Item|Vanishing Creme}} |
||
| − | | After a crawlspace through a stone bump, there is a ladder down into a cave where you'll find a strange eyeball-door blocking the way to a holder as you approach. Slam a Vanishing Creme and walk on through. |
||
| − | | [[File:Shantae_(USA)_46_HH2.png|60px]] |
||
| − | [[File:Shantae_(USA)_48_HH2.png|60px]] |
||
| − | |- |
||
| − | | 3 |
||
| − | | {{Shantae1place|Spider Forest}} |
||
| − | | {{Form|Spider}} / Cuff + Tiara |
||
| − | | |
||
| − | |- |
||
| − | | 4 |
||
| − | | {{Shantae1place|Mud Bog}} |
||
| − | | {{Form|Elephant}}+{{Item|Float Muffin}}/{{Form|Harpy}} |
||
| − | | |
||
| − | |- |
||
| − | | 5 |
||
| − | | {{Shantae1place|Mens Desert}} |
||
| − | | {{Form|Harpy}} |
||
| − | | |
||
| − | |- |
||
| − | | 6 |
||
| − | | {{Shantae1place|Archer Forest}} |
||
| − | | {{Form|Elephant}}+{{Item|Twin Mint}} |
||
| − | |When you encounter the archer who shoots on top of a stone arch which stands over a stump. Destroy the stump by using the elephant form and go down the ladder, in the cave there will a be weirdo clown who enjoys cute '''girls''' dancing. Use the Twin Mints, and simply dance. |
||
| − | |- |
||
| − | | 7 |
||
| − | | {{Shantae1place|Mount Pointy}} |
||
| − | | {{Form|Harpy}} |
||
| − | | |
||
| − | |} |
||
| − | === |
+ | ===Fireflies=== |
| + | {{grab|Fireflies}} |
||
| − | There are twelve fireflies in ''Shantae''. Getting all twelve will allow Shantae to read the scroll in the [[Firefly Shrine]] in [[Water Town]] that will allow her to learn the [[Bellydances#Other dances|Healing Dance]]. They only appear at night, and only in outdoor locations (so there's no point in searching in caves or labyrinths). |
||
| − | |||
| − | Because - unlike other collectible items in the game - Fireflies are only useful when you have all of them, it's best to leave the Firefly hunt to the end when Shantae is more powerful and can transform into the Harpy or Tinkerbat. This will make the whole process easier and faster. |
||
| − | |||
| − | {| class="sortable mergetable standardtable" border=0 cellpadding=0 cellspacing=0 |
||
| − | |- valign="top" style="border:1px solid #ccc; |
||
| − | ! # |
||
| − | ! Location |
||
| − | ! Required |
||
| − | ! Description |
||
| − | | Screenshot |
||
| − | |- |
||
| − | | 1 |
||
| − | | {{Shantae1place|Scarecrow Field}} |
||
| − | | - |
||
| − | | Hovering over a small platform held up by two pillars. |
||
| − | | [[File:Shantae_(USA)_54_FF1.png|160px]] |
||
| − | |- |
||
| − | | 2 |
||
| − | | {{Shantae1place|Rain Storm}} |
||
| − | | - |
||
| − | | |
||
| − | |- |
||
| − | | 3 |
||
| − | | {{Shantae1place|Waterfall Lake}} |
||
| − | | {{Form|Spider}} |
||
| − | | |
||
| − | |- |
||
| − | | 4 |
||
| − | | {{Shantae1place|Snail Wasteland}} |
||
| − | | {{Form|Spider}} |
||
| − | | About two thirds of the way through the Snail area is a rocky area that can be climbed. Immediately to the right of the top of this plateau is a firefly. |
||
| − | | [[File:Scr_ff_snail.png|160px]] |
||
| − | |- |
||
| − | | 5 |
||
| − | | {{Shantae1place|Hidden Waterfall Area}} |
||
| − | | {{Form|Monkey}}/{{Form|Spider}} |
||
| − | | In the Hidden Waterfall area, stand on the branch on the far right and turn into either the monkey or the spider and climb upwards through the gap. There is a little chamber with a firefly in it. |
||
| − | | [[File:Scr_ff_hidden_waterfall.png|160px]] |
||
| − | |- |
||
| − | | 6 |
||
| − | | {{Shantae1place|Naga Wasteland}} |
||
| − | | {{Form|Spider}}+{{Form|Monkey}} |
||
| − | | |
||
| − | |- |
||
| − | | 7 |
||
| − | | {{Shantae1place|Eagle Wasteland}} |
||
| − | | {{Form|Spider}}+{{Form|Monkey}} |
||
| − | | |
||
| − | |- |
||
| − | | 8 |
||
| − | | {{Shantae1place|Mount Pointy}} |
||
| − | | {{Form|Harpy}}/{{Form|Monkey}} |
||
| − | | |
||
| − | |- |
||
| − | | 9 |
||
| − | | {{Shantae1place|Mud Bog}} |
||
| − | | {{Form|Monkey}} |
||
| − | | |
||
| − | |- |
||
| − | | 10 |
||
| − | | {{Shantae1place|Ghost Forest}} |
||
| − | | {{Form|Monkey}} |
||
| − | | It is found at the first of the walls that initially divides this area. If you use the Monkey to climb up, you will find a little area inset into the wall with a firefly. |
||
| − | | [[File:Scr_ff_ghost_forest.png|160px]] |
||
| − | |- |
||
| − | | 11 |
||
| − | | {{Shantae1place|Ghost Forest}} |
||
| − | | {{Form|Harpy}} |
||
| − | | |
||
| − | |- |
||
| − | | 12 |
||
| − | | {{Shantae1place|Archer Forest}} |
||
| − | | - |
||
| − | | |
||
| − | |} |
||
===Transformation Talismans=== |
===Transformation Talismans=== |
||
| + | {{grab|Transformation Talismans}} |
||
| + | ===Baby Warp Squids=== |
||
| − | {| class="sortable mergetable standardtable" |
||
| + | {{grab|Baby Warp Squids (Shantae)}} |
||
| − | |- valign="top" style="border:1px solid #ccc;" |
||
| − | ! # |
||
| − | ! Name |
||
| − | ! Location |
||
| − | ! Required |
||
| − | ! Description |
||
| − | | Scr |
||
| − | |- |
||
| − | | 1 |
||
| − | | {{Item|Monkey Claw}} |
||
| − | | a cave in<br />{{Shantae1place|Hidden Forest}} |
||
| − | | {{Form|Monkey}}{{Form|Elephant}}{{Item|Storm Puff}} |
||
| − | | At the far end of the Hidden Forest is a cave with a strange little creature with a TV antennae. An electric Storm Puff blast will clear him from your path, allowing access to the Monkey Claw. |
||
| − | |- |
||
| − | | 2 |
||
| − | | {{Item|Elephant Tote}} |
||
| − | | a cave near<br />{{Shantae1place|Waterfall Lake}},<br />{{Shantae1place|Snail Wasteland}}, {{Shantae1place|Hidden Waterfall}} |
||
| − | | {{Form|Spider}}{{Form|Elephant}} |
||
| − | | There's a cave that connects the Snail Wasteland to Waterfall Lake. The tote is plainly visible within. |
||
| − | |- |
||
| − | | 3 |
||
| − | | {{Item|Spider Venom}} |
||
| − | | {{Shantae1place|Mud Bog}} |
||
| − | | {{Form|Harpy}} |
||
| − | | |
||
| − | |- |
||
| − | | 4 |
||
| − | | {{Item|Harpy Talon}} |
||
| − | | {{Shantae1place|Scarecrow Field}} |
||
| − | | {{Form|Harpy}} |
||
| − | | |
||
| − | |} |
||
| − | |||
| − | ===[[File:Shantae_GBC_-_sprite_-_Baby_Warp_Squid.gif|32px]] Baby Warp Squids=== |
||
| − | |||
| − | {| class="sortable mergetable standardtable" border=0 cellpadding=0 cellspacing=0 |
||
| − | |- valign="top" style="border:1px solid #ccc;" |
||
| − | ! # |
||
| − | ! Location |
||
| − | ! Required |
||
| − | ! Description |
||
| − | ! Screen |
||
| − | |- |
||
| − | | 1 |
||
| − | | [[Dribble Fountain]] |
||
| − | | |
||
| − | | In the green lit chamber following the first encounter with a shapeshifting water elemental miniboss, this one can be found just sitting on a pile of pink blocks. |
||
| − | | [[File:Scr_dribble_ws2.png|160px]] |
||
| − | |- |
||
| − | | 2 |
||
| − | | [[Dribble Fountain]] |
||
| − | | |
||
| − | | In a hidden room accessible by crawling under an overhang of pink stones at the bottom of the shaft in the chamber immediately to the right of where the white worm platforms first appear. |
||
| − | | [[File:Scr_dribble_ws1.png|160px]] |
||
| − | |- |
||
| − | | 3 |
||
| − | | [[Dribble Fountain]] |
||
| − | | {{Form|Monkey}} |
||
| − | | To the west of the [[Guardian Genie]] chamber there is a baby warp squid on a raised platform. |
||
| − | | |
||
| − | |- |
||
| − | | 4 |
||
| − | | [[Dribble Fountain]] |
||
| − | | |
||
| − | | |
||
| − | |- |
||
| − | | 5 |
||
| − | | [[Dribble Fountain]] |
||
| − | | |
||
| − | | |
||
| − | |- |
||
| − | | 6 |
||
| − | | [[Golem Mine]] |
||
| − | | |
||
| − | | Take the first elevator down until you reach a point where you are flanked by two circular barred windows. Walk through the wall on the right to find the little guy. |
||
| − | | [[File:Scr_golem_mine_ws1.png|160px]] |
||
| − | |- |
||
| − | | 7 |
||
| − | | [[Golem Mine]] |
||
| − | | {{Form|Monkey}} {{Form|Elephant}} |
||
| − | | You can see this one from the elevator, but you won't be able to reach it till later. Behind a locked door to the left of the elevator shaft is a room with a golem and four hanging lantern platforms. Use the monkey to scale up a shaft on the ceiling and then the elephant to smash through some stalagamajigs in an opening on the right. |
||
| − | | [[File:Scr_golem_mine_ws2.png|160px]] |
||
| − | |- |
||
| − | | 8 |
||
| − | | [[Golem Mine]] |
||
| − | | {{Form|Monkey}} |
||
| − | | In the chamber just above the shaft you scaled to reach the last warp squid, there are a bunch blue lightning guys who rain bolts down on you. Go to the left and find the secret passage that leads you up to their level, and turn the tables on them. Once you've killed them all you'll find a baby warp squid to the right. |
||
| − | | [[File:Scr_golem_mine_ws3.png|160px]] |
||
| − | |- |
||
| − | | 9 |
||
| − | | [[Golem Mine]] |
||
| − | | {{Form|Elephant}} |
||
| − | | Close to the entrance, past the first set of stalageroonies you encountered on your way down, is a room where you fight one of those magnet men and acquire a key. The top left corner of this room has a hidden chamber with a warp squid inside. |
||
| − | | [[File:Scr_golem_mine_ws4.png|160px]] |
||
| − | |- |
||
| − | | 10 |
||
| − | | [[Golem Mine]] |
||
| − | | |
||
| − | | |
||
| − | |- |
||
| − | | 11 |
||
| − | | [[Cackle Mound]] |
||
| − | | {{Form|Monkey}} |
||
| − | | Immediately after the entrance hall is a room with two vertical shafts. At the top of both is a passageway leading betwixt the two, with a little cephalopod waiting for you. |
||
| − | | [[File:Scr_cackle_mound_ws3.png|160px]] |
||
| − | |- |
||
| − | | 12 |
||
| − | | [[Cackle Mound]] |
||
| − | | {{Form|Monkey}} |
||
| − | | In the first room with the eyeball platforms and spikes, ride the eyeball to the right until you pass under an overhang and arrive at another eyeball similarly placed under the floor like the first one. There is an eyeball platform above that can be reached with the monkey - ride it upwards to find a baby warp squid. |
||
| − | | [[File:Scr_cackle_mound_ws2.png|160px]] |
||
| − | |- |
||
| − | | 13 |
||
| − | | [[Cackle Mound]] |
||
| − | | |
||
| − | | There is a long corridor with a spiked ceiling and a floor full of spike traps. At one point you are expected to ride an eye platform up to reach another area - but if you stay aboard, you'll pass through the ceiling and find a warp squid waiting for you in a hidden chamber. |
||
| − | | [[File:Scr_cacle_mound_ws1.png|160px]] |
||
| − | |- |
||
| − | | 14 |
||
| − | | [[Cackle Mound]] |
||
| − | | |
||
| − | | |
||
| − | |- |
||
| − | | 15 |
||
| − | | [[Cackle Mound]] |
||
| − | | |
||
| − | | |
||
| − | |- |
||
| − | | 16 |
||
| − | | [[Twinkle Palace]] |
||
| − | | |
||
| − | | |
||
| − | |- |
||
| − | | 17 |
||
| − | | [[Twinkle Palace]] |
||
| − | | |
||
| − | | |
||
| − | |- |
||
| − | | 18 |
||
| − | | [[Twinkle Palace]] |
||
| − | | |
||
| − | | |
||
| − | |- |
||
| − | | 19 |
||
| − | | [[Twinkle Palace]] |
||
| − | | |
||
| − | | |
||
| − | |- |
||
| − | | 20 |
||
| − | | [[Twinkle Palace]] |
||
| − | | |
||
| − | | |
||
| − | |} |
||
| − | [[Category:Items and Abilities]] |
||
==References== |
==References== |
||
| Line 427: | Line 137: | ||
{{ShantaeGBCNavbox}} |
{{ShantaeGBCNavbox}} |
||
| − | [[Category:Items |
+ | [[Category:Items]] |
| + | [[Category:Shantae (game)]] |
||
Revision as of 22:40, 24 September 2017
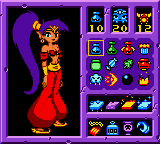
Shantae's full inventory.
Here is a list of items from Shantae for the GBC.[1]
Basic Items
| Img | Item Name | Cost | Description |
|---|---|---|---|
| Firefly | - | Collect all 12 of them to learn a special dance. | |
| Heart Holder | - | Add an extra heart to your life meter. | |
| 1up | - | Extra life. | |
| Small Heart | - | Restore one heart. | |
| Large Heart | - | Restores three hearts. | |
| Small Gem | - | Gives you 1 gem. Used to buy items and pay for the Tinkerbat Dance. | |
| Big Gem | - | Gives you 5 gems. Used to buy items and pay for the Tinkerbat Dance. | |
| Extra-Large Gem | - | Gives you 20 gems. Used to buy items and pay for the Tinkerbat Dance. | |
| Small Vial | 50 | Restores a few Hearts. | |
| Medium Vial | 75 | Restores several Hearts. | |
| Large Vial | 100 | Restores all Hearts. | |
| Vanish Cream | 30 | Lets you walk past enemies! | |
| Storm Puffs (20) | 25 | Tricky to use, but extremely powerful. | |
| Pike Balls (10) | 25 | These mines spin around your body and damage enemies if they touch them, for limited time. | |
| Float Muffins (20) | 20 | Give you protection against pits. | |
| Exit Candy | 20 | Used for exiting labyrinths. | |
| Flash Bolts (10) | 25 | Attack from a distance. | |
| Twin Mints | 30 | Doubles your attack power. | |
| Greedy Jars (5) | 30 | Makes enemies drop double the loot! | |
| Fireballs (10) | 20 | Faster/stronger than a pike ball. | |
| Key | - | Used to open locks. Found and used only in dungeons. |
Fighter's Gear
The Fighter's Gear is a set of four items that can be purchased in Water Town for large sums of money. They give Shantae special attacks that are activated with certain button presses or combinations.
| Item | Cost | Description |
|---|---|---|
| Boot
|
300 |
Double-tap This is an extremely handy attack to have, as it allows you to attack enemies above you very easily, without the precise timing of a jump-whip. |
| Sash
|
400 |
Attack ( The drill attack is ideal for hitting enemies below you. It travels perfectly diagonally, which makes it easy to aim even at the smallest of targets. If the target survives, Shantae will immediately end the kick and drop to the ground; keep this in mind if you wish to avoid the target's retaliatory collision damage. |
| Cuff
|
500 |
Hold down attack ( This one takes a while to charge. It can't be cancelled, so you might have to re-train yourself not to hold the |
| Tiara
|
900 |
Attack ( The attack is powerful, but it comes with the dangers of the elbow dash, and requires more time to prepare. An additional advantage of this form is that it takes you very high, so a few items that would otherwise require a more advanced transformation can be gotten without said forms. That said, it's extremely expensive, so by the time you can afford it you might already have the requisite form. |
![]() The above section was transcluded from Fighter's Gear. Go there to edit it.
The above section was transcluded from Fighter's Gear. Go there to edit it.
Heart Holders
![]() The Heart Holders increases the heart counters, and thus allow you to live longer. They are found in the wilderness and in caves. Bring a wide variety of items with you as you will need several kinds to get them all. See here for the exact locations.
The Heart Holders increases the heart counters, and thus allow you to live longer. They are found in the wilderness and in caves. Bring a wide variety of items with you as you will need several kinds to get them all. See here for the exact locations.
| # | Location | Required | Description | Img |
|---|---|---|---|---|
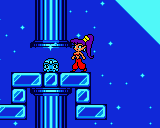
| 1 | Scarecrow Field | On a slab of rock held by two pillars. Have the monkey jump up there. | 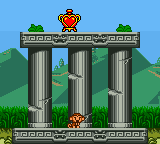
| |
| 2 | Naga Wasteland | After a crawlspace through a stone bump, there is a ladder down into a cave where you'll find a strange eyeball-door blocking the way to a holder as you approach. Slam a Vanishing Creme and walk on through.[Note: It is possible to get the heart holder without the vanishing creme by forcing the door to open then rush on in while the door is raising up.] |
| |
| 3 | Spider Forest | There's a pyramid-shaped hill with slidey leafy slopes in the Spider Forest. It would take a spider to reach it. [Note: This holder does not technically need the spider. It can be obtained by rather haphazardly jumping off the blocks in the middle on to the leaves and then jumping off again for an early-game health boost.] | ||
| 4 | Mud Bog | +/ | Use the elephant to smash a square of rock found at the foot of one of the rocky bits. Within you will find a cave with a wide pit and a low ceilling. Slamming a Float Muffin will allow you to cross the pit, or you can come back when you have the Harpy form. | |
| 5 | Archer Forest | + | When you encounter the archer who shoots on top of a stone arch which stands over a stump. Destroy the stump by using the elephant form and go down the ladder, in the cave there will a be weirdo clown who enjoys cute girls dancing. Use the Twin Mints, and simply dance. | |
| 6 | Mens Desert | High above the sands are upside down pyramids floating there like gravity were someone else's problem. On one of them you'll find a Heart Holder. | ||
| 7 | Mount Pointy | If you flap around the icicle 'roof' of the area enough, you'll find an indentation with this Heart Holder sitting in it. It's on the left side of the summit of Mount Pointy. |
![]() The above section was transcluded from Heart Holders (Shantae). Go there to edit it.
The above section was transcluded from Heart Holders (Shantae). Go there to edit it.
Fireflies
There are 12 fireflies in Shantae. Getting all 12 will allow Shantae to read the scroll in the Firefly Shrine in Water Town that will allow her to learn the Healing Dance. They only appear at night, and only in outdoor locations (so there's no point in searching in caves or labyrinths).
Because - unlike other collectible items in the game - Fireflies are only useful when you have all of them, it's best to leave the Firefly hunt to the end when Shantae is more powerful and can transform into the Harpy or Tinkerbat. This will make the whole process easier and faster.
| # | Location | Required | Description | Screenshot |
|---|---|---|---|---|
| 1 | Scarecrow Field | - | Hovering over a small platform held up by two pillars. | 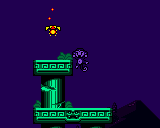
|
| 2 | Rain Storm | - | The Firefly is easily found near the beginning. | 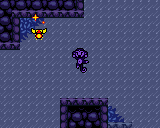
|
| 3 | Waterfall Lake | This one is in plain sight from the start, but cannot be reached until the Spider form is acquired. | 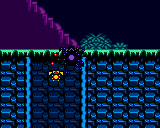
| |
| 4 | Snail Wasteland | / | About two thirds of the way through the Snail area is a rocky area that can be climbed. Immediately to the right of the top of this plateau is a Firefly. | 
|
| 5 | Hidden Waterfall | / | In the Hidden Waterfall area, stand on the branch on the far right and turn into either the monkey or the harpy and climb/fly upwards through the gap. There is a little chamber with a Firefly in it. | 
|
| 6 | Naga Wasteland | + | The leftmost rocky part of this area (the one that features a vertical shaft lined with spikes) has this Firefly at its summit. While it's possible to get it with the Monkey and the Spider, it's far easier just to come back later as a Harpy. | 
|
| 7 | Eagle Wasteland | + | Close to the right entrance is a tall climbable surface for the Spider. Towards the top there is a platform with two bats nearby. From there, drop to a platform just out of sight below that one where you will find the Firefly. | 
|
| 8 | Mount Pointy | The Firefly is in plain view just above the Save Guy, on the western cliff face of the mountain. | 
| |
| 9 | Mud Bog | The very first climbable area you find heading westward, climb it, and you'll immediately find a glowing insect. | 
| |
| 10 | Ghost Forest | It is found at the first of the walls that initially divides this area. If you use the Monkey to climb up, you will find a little area inset into the wall with a Firefly. | 
| |
| 11 | Ghost Forest | Fly directly above the left entrance and find this Firefly in an indentaiton in the rocks. | 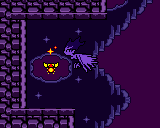
| |
| 12 | Archer Forest | In plain view over some ruins just right of the massive pit that requires the Spider to pass. | 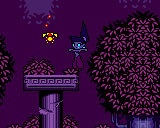
|
![]() The above section was transcluded from Fireflies. Go there to edit it.
The above section was transcluded from Fireflies. Go there to edit it.
Transformation Talismans
The Transformation Talismans are the final Alliterative Acquirables the player will encounter. They are utterly optional but allow you to attack while transformed.
| # | Name | Location | Required | Description | Scr |
|---|---|---|---|---|---|
| 1 | Monkey Claw | a cave in Hidden Forest |
At the far end of the Hidden Forest is a cave with a strange little creature with a TV antennae. An electric Storm Puff blast will clear him from your path, allowing access to the Monkey Claw. | 
| |
| 2 | Elephant Tote | a cave near Waterfall Lake, Snail Wasteland, Hidden Waterfall |
There's a cave that connects the Snail Wasteland to Waterfall Lake. The tote is plainly visible within. | 
| |
| 3 | Spider Venom | Mud Bog | The venom is found atop the secondest mushroom/insect pillar. | 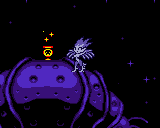
| |
| 4 | Harpy Talon | Scarecrow Field | When you come across the first group of pillars, fly as high as you can - directly above is a strange-shaped floating ruin with the Harpy Talon resting on it. | 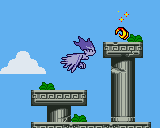
|
![]() The above section was transcluded from Transformation Talismans. Go there to edit it.
The above section was transcluded from Transformation Talismans. Go there to edit it.
Baby Warp Squids
The Baby Warp Squids in Shantae are hidden in the various labyrinths and must be brought to Warp Squid Mothers so that Shantae may learn the Warp dances. These dances enable her to warp instantly to the corresponding town.
Most BWSs can be acquired on the first visit to the labyrinth, but there is one in each of the first three labyrinths that will require revisiting at a later time once the requisite transformation is acquired.
Dribble Fountain
| # | Required | Description | Screen |
|---|---|---|---|
| 1 | - | In the green lit chamber following the first encounter with a shapeshifting water elemental miniboss, this one can be found just sitting on a pile of pink blocks. | 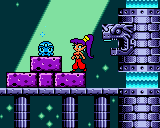
|
| 2 | - | In a hidden room accessible by crawling under an overhang of pink stones at the bottom of the shaft in the chamber immediately to the right of where the white worm platforms first appear. | 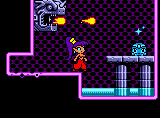
|
| 3 | To the west of the Guardian Genie chamber there is a baby warp squid on a raised platform.
It is also reachable without the monkey transformation by pushing the stone block from the destroyed pillar on the right, only if the stone block hasn't been used yet. |

| |
| 4 | / | In the room that must be reached by running over a succession of pits with jumping fish in them, there are little indents in the ceiling indicating a secret passage. You can get up here with the Monkey, but if you have trouble you can just come back with the Harpy form, since you'll need to come back anyway to get the last one. Be sure to ride all the way up, as there are two floors in this secret passage, and the baby's up there on the second one. | 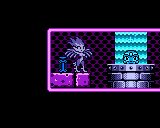
|
| 5 | / | Atop a platform you can't initially reach in the platform/water/jumping eye fish section near the start. Come back later with the Spider or Harpy form and either climb the background blue grid as the Spider or fly as the Harpy. | 
|
![]() The above section was transcluded from Baby Warp Squids in Dribble Fountain (Shantae). Go there to edit it.
The above section was transcluded from Baby Warp Squids in Dribble Fountain (Shantae). Go there to edit it.
Golem Mine
| # | Required | Description | Screen |
|---|---|---|---|
| 1 | Take the first elevator down until you reach a point where you are flanked by two circular barred windows. Walk through the wall on the right to find the little guy. | 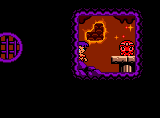
| |
| 2 | You can see this one from the elevator, but you won't be able to reach it till later. Behind a locked door to the left of the elevator shaft is a room with a golem and four hanging lantern platforms. Use the monkey to scale up a shaft on the ceiling and then the elephant to smash through some stalagamajigs in an opening on the right. | 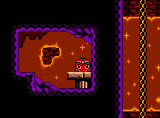
| |
| 3 | In the chamber just above the shaft you scaled to reach the last warp squid, there are a bunch of blue lightning guys who rain bolts down on you. Go to the left and find the secret passage that leads you up to their level, and turn the tables on them. Once you've killed them all you'll find a baby warp squid to the right. | 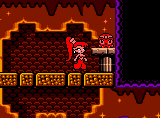
| |
| 4 | Close to the entrance, past the first set of stalageroonies you encountered on your way down, is a room where you fight one of those magnet men and acquire a key. The top left corner of this room has a hidden chamber with a warp squid inside. | 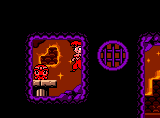
| |
| 5 | In the room where you have to elephant charge a statue to get some stalagmites to fall into a pool of lava (all the way down the main elevator, then go through the left door), there is a BWS on a platform to the left and to the up of the lava pool in that room. | 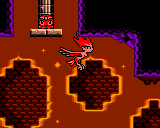
|
![]() The above section was transcluded from Baby Warp Squids in Golem Mine (Shantae). Go there to edit it.
The above section was transcluded from Baby Warp Squids in Golem Mine (Shantae). Go there to edit it.
Cackle Mound
| # | Required | Description | Screen |
|---|---|---|---|
| 1 | Immediately after the entrance hall is a room with two vertical shafts. At the top of both is a passageway leading betwixt the two, with a little cephalopod waiting for you. | 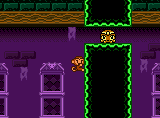
| |
| 2 | In the first room with the eyeball platforms and spikes, ride the eyeball to the right until you pass under an overhang and arrive at another eyeball similarly placed under the floor like the first one. There is an eyeball platform above that can be reached with the monkey - ride it upwards to find a baby warp squid. | 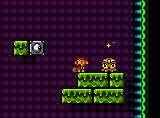
| |
| 3 | - | There is a long corridor with a spiked ceiling and a floor full of spike traps. At one point you are expected to ride an eye platform up to reach another area - but if you stay aboard, you'll pass through the ceiling and find a warp squid waiting for you in a hidden chamber. | 
|
| 4 | There's a room with an arrow pointing up. While it may be an insanely obvious clue, it's also easy to overlook. Jump up there with the Monkey (be careful to get exactly the right spot) and climb to find it. | 
| |
| 5 | There is a room made of slopes that will slide Shantae all the way to the bottom. Once you have Harpy form, fly upwards from the bottom to find an enclave across from the last slope with Baby Warp Squid. | 
|
![]() The above section was transcluded from Baby Warp Squids in Cackle Mound (Shantae). Go there to edit it.
The above section was transcluded from Baby Warp Squids in Cackle Mound (Shantae). Go there to edit it.
Twinkle Palace
| # | Required | Description | Screen |
|---|---|---|---|
| 1 | In the first room you find with the fiery vortexes that spin Shantae around and spit her out in whatever direction you press, there is a set of hidden tunnels crossing through the leftmost wall. Both are clearly suggested by an inset in the wall. Following the horizontal one will lead you to a little space with a Baby Warp Squid. | 
| |
| 2 | From the 'floor' of the first fiery vortex room, Monkey climb the eastern wall and jump onto the strange-shaped platform of ice. Transform into Shantae and do a leap of faith to the left. When you hit the vortex, press |
| |
| 3 | There is a room later in the labyrinth with two entrances, each with a suspicious crawlspace below, and a large 'crown' shape in the middle of the room which holds three puddles of jumping fish. Crawl into said crawlspaces and navigate hidden passages until you reach the baby warp squid and a fiery vortex. | 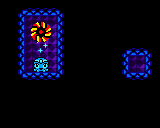
| |
| 4 | / | To the left of the previous squid, past a locked door, is a tall room filled with puddles of jumping fish. The warp squid is on a high ledge but otherwise in plain view and easy to access. | 
|
| 5 | You'll see this one early on from above, but you'll need the Harpy form to be able to get it from below. Fly to the top of that first fiery vortex room, and there it is. | 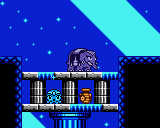
|
![]() The above section was transcluded from Baby Warp Squids in Twinkle Palace (Shantae). Go there to edit it.
The above section was transcluded from Baby Warp Squids in Twinkle Palace (Shantae). Go there to edit it.
![]() The above section was transcluded from Baby Warp Squids (Shantae). Go there to edit it.
The above section was transcluded from Baby Warp Squids (Shantae). Go there to edit it.
References
- ↑ http://www.gamefaqs.com/gbc/550864-shantae/faqs/19368 Shantae FAQ by Daniel (FecalLord) Engel
| ||||||||||||||
| ||||||